
Wireshark 101 – The Interface
Welcome back to Wireshark 101! Last week I wrote an article that hopefully got you interested in Wireshark, and this week I’ll walk you through installing it and getting some exposure to the interface. Recall my caveat about not using Wireshark at work, school or any other place where you aren’t explicitly permitted to do so. With that in mind, let’s install Wireshark and take a short tour.
The latest version of Wireshark can always be downloaded from www.wireshark.org. We’ll be using Wireshark 1.12 which was released on July 31, 2014. The download link should be at the bottom left of the page. Just grab the version that’s appropriate for you–I’m using the 64-bit version of the Windows installer for this article. If you’re running Mac OS X, your interface will look a little different but for the most part it’s pretty similar. Upon running the installer, you’ll be faced with some check boxes on the “Choose Components” window. I’m leaving everything checked except “Wireshark 2 Preview”. On the following windows, “Select Additional Tasks” and “Choose Install Location”, we can use the default settings. Leave “Install WinPcap 4.1.3” checked on the “Install WinPcap?” window and then choose “Install”. Another installation process will be launched for WinPcap and “Automatically start the WinPcap driver at boot time” can be left checked. After that WinPcap is done, Wireshark will finish up installing and you’ll have the option to go ahead and run it!
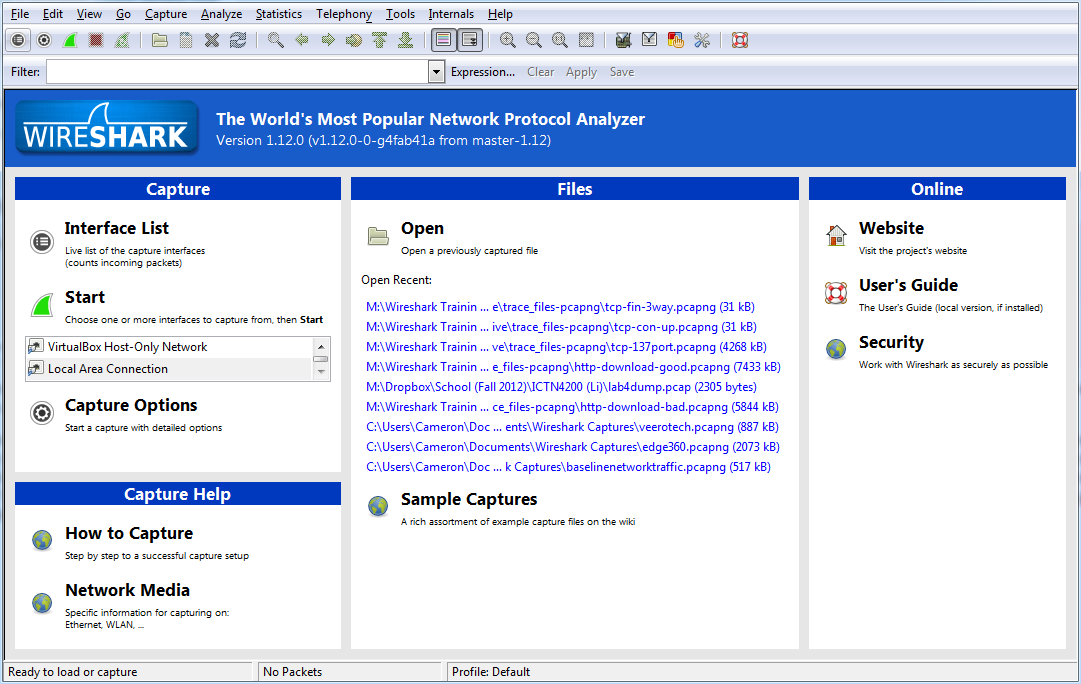
You’ll be greeted with a screen that looks pretty much like the screenshot above. The section titles speak for themselves here. We have a capture section, a capture help section, a files section and an online help section. You won’t normally spend much time on this window, so let’s continue on and get to the real interface that you’ll come to know as home! Under “Capture”, choose the “Local Area Connection” interface and then click the green shark fin just above it. Note: if you’re on a laptop, you’ll need to select a wireless interface. I am not sure how they are differentiated. If all went as planned, you’ll be taken to a new interface similar to the one below.
Oh no, information overload! Depending on how noisy your computer or network is, you should start seeing a list of rows with different numbers and colored backgrounds fly by pretty soon. If your window doesn’t look something like mine after about 30 seconds, you might have chosen the wrong capture interface or maybe you just aren’t generating any network traffic. My suggestion is to try minimizing Wireshark and browsing to a webpage, something like www.google.com. When you come back, you should have some packets. If you don’t, you need to select a different capture interface by clicking the “List the available capture interfaces…” icon which is two icons to the left of the green shark fin at the top of the window. Check the box for a different interface than the one that’s selected and click “Start” and “Continue without saving”.
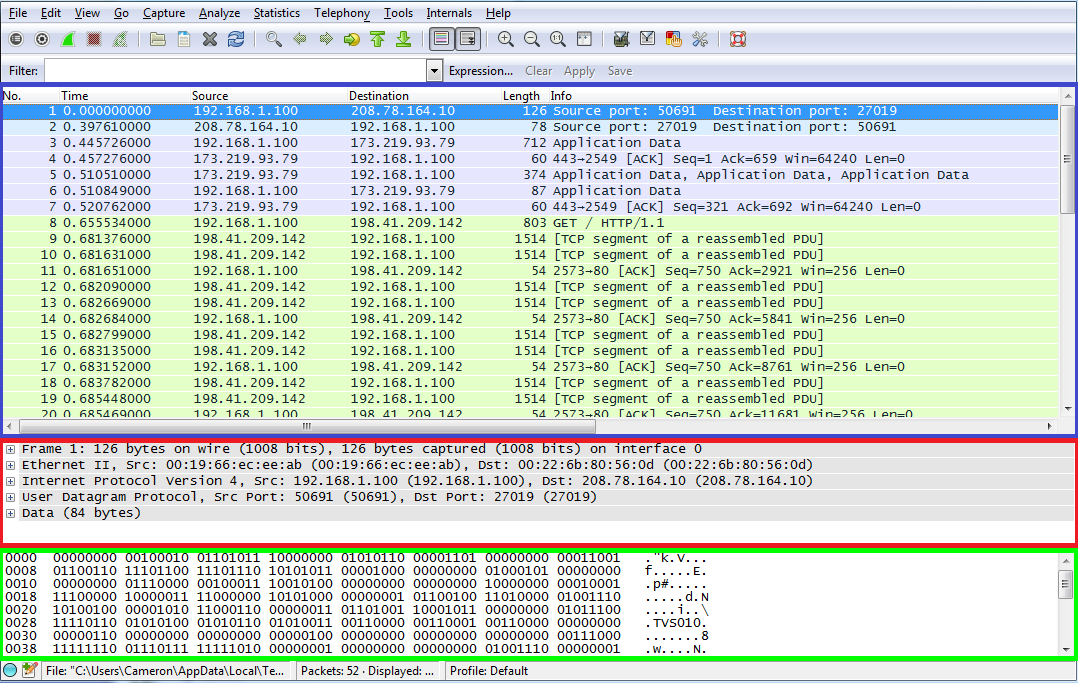
Once you’ve got a few packets captured, press the red stop button to the right of the green shark fin icon near the top. Now we can take a look at each part of the user interface at our leisure. The top section with the columns such as “No.”, “Time”, “Source” and “Destination”, as well as the rows for each packet, is known as the packet list pane. As you might guess, it lists the captured packets along with some specified details of each packet in the columns. The middle section is known as the packet details pane. This is where you can get an in-depth examination of one particular packet once it’s selected in the packet list pane. The pane at the bottom with all the 1’s and 0’s is the packet bytes pane, and it shows you the actual binary data as well as an ASCII interpretation of the bytes for the currently selected packet. That means if we were looking at raw HTML from a webpage, for example, we could see that in the packet bytes pane in the ASCII column. With no particular reasoning behind the choice of colors, I’ve outlined the packet list pane in blue, the packet details pane in red, and the packet bytes pane in green in the image above. These panes can be resized if you’d like to adjust the layout–just hover your mouse cursor between two panes until your cursor icon changes, then click and drag to the desired size.
Congrulations! You’ve completed your first packet capture! You can save it if you like by choosing File > Save and choosing a destination, but we won’t be using it anymore. That’s all we are doing for this article! To exit, just click the red “X” at the top right of the window. I know it looks like a lot to take in right now, but we will take it nice and slow while building up our Wireshark skills. In the next article we’ll send some ICMP ping packets, examine one of them from beginning to end and get a handle on how all this information is organized and how we can organize it further.